If your beer dispenser isn’t cooling, the most common culprits are often simple issues like a loose power connection, incorrect thermostat settings, or obstructed airflow. Many problems can be resolved with basic troubleshooting, such as ensuring the unit is plugged in, setting the temperature between 36-40°F (2-4°C), and clearing any blockages around vents or condenser coils. Addressing these common issues can quickly restore your dispenser to optimal chilling performance.
Understanding Your Beer Dispenser’s Cooling Essentials
At its core, a beer dispenser, often a kegerator, operates much like a standard refrigerator, relying on a vapor compression refrigeration cycle to maintain optimal temperatures. This system involves several key components working in harmony. The compressor circulates refrigerant, a chemical compound that absorbs heat. The condenser releases this heat into the surrounding environment, while the evaporator absorbs heat from inside the unit, chilling the air or liquid. Fans, both condenser and evaporator, facilitate air movement for efficient heat exchange and even cooling. Finally, the thermostat acts as the brain, monitoring the internal temperature and signaling the compressor to turn on or off to maintain the desired setting. When any part of this intricate system falters, your beer dispenser struggles to get cold.
Start with the Basics: Simple Checks for No Cooling
Before examine complex repairs, always begin with the most straightforward checks. Often, the solution to a warm beer dispenser is surprisingly simple and can be resolved in minutes.
Power and Settings: The First Line of Defense
Ensure your beer dispenser is securely plugged into a functioning electrical outlet. Sometimes, an accidental bump or a loose connection can interrupt power. Check your home or business’s circuit breaker box; a tripped breaker can cut power to the unit. Verify that the thermostat is set to the correct temperature, typically between 36-40°F (2-4°C) for most beers. It’s easy for settings to be accidentally adjusted, leading to inadequate cooling.
Airflow Obstructions: Let Your Dispenser Breathe
Just like any refrigeration unit, a beer dispenser needs proper airflow to dissipate heat efficiently. Inside the unit, ensure that kegs or other items aren’t blocking internal air vents, which are crucial for circulating cold air. Externally, check the rear and sides of the dispenser. Many manufacturers recommend maintaining at least 4 inches (approximately 100mm) of clearance on all sides to allow the condenser to expel warm air effectively. Blocked vents force the compressor to work harder, generating more heat and leading to poor cooling performance.
Door Seal Integrity: Keeping the Cold In
|
Our Picks for the Best Beer Dispenser in 2026
As an Amazon Associate I earn from qualifying purchases.
|
||
| Num | Product | Action |
|---|---|---|
| 1 | Beer Dispenser Margarita Tower, 50oz Mimosa Tower Dispenser with Ice Tube and LED Light, Tabletop Drink Tower Dispenser 1.6 qt for Beer, Margarita, Liquor, Beverage |

|
| 2 | Hammer + Axe Beverage Dispenser – 88 oz Party Drink Dispenser with Ice Tube & Tap| Drink Fountain for Beer, Water, Iced Tea| Mimosa Tower| Margarita Tower| BBQ & Tailgate Essential| Home Bar Accessory |
|
| 3 | Hammer + Axe Beverage Dispenser – 88 oz Party Drink Dispenser with Ice Tube & Tap| Drink Fountain for Beer, Water, Iced Tea| Mimosa Tower| Margarita Tower| BBQ & Tailgate Essential| Home Bar Accessory |
|
| 4 | 2pcs Beer Giraffe Dispenser, 100oz/3.2 qt Mimosa Tower Dispenser with Ice Tube and LED Light, 3L Tabletop Drink Tower Dispensers for Beer, Margarita, Liquor, Beverage |
|
| 5 | -Beverage Dispenser - Drink Dispensers for Parties -Perfect Home Bar Accessories - Alcohol, Beer & Liquor Dispenser - Mimosa Tower |
|
| 6 | BeerSquad Beer Tower - 3L 100 oz. Clear Beverage Tower Dispenser with Included Ice Tube, Easy Clean, Dual Action Integrated Tap |
|
| 7 | Beer Tower 3L/100oz Beverage Dispenser with fluent Spigot & Ice Tube,Margarita Tower, Mimosa Tower, Tabletop Liquor Drink Dispenser for Parties, Bars, Pubs, Restaurants |
|
| 8 | OGGI Beer Tower 88oz - Beverage Dispenser with Spigot & Ice Tube, Margarita Tower, Mimosa Tower, Perfect Drink Dispensers for Parties, Drink Tower, Holds 6 Pints of Beer – Stainless |
|
| 9 | Drink Tower, 3L Mimosa Tower Dispenser With Ice Tube and Led Light, Tabletop Beer Dispenser 3.17 Qt./101oz, Ideal for Parties Bars Pubs Restaurants |
|
| 10 | Beer Dispenser, 100oz/3.2 qt Mimosa Tower Dispenser with Ice Tube and LED Light for Margarita, Liquor, Beverage - Tabletop Drink Tower Dispensers for Parties |
|
A compromised door seal, also known as a gasket, is a common culprit for warm temperatures. Over time, these rubber seals can become dirty, cracked, or hardened, allowing warm ambient air to seep into the dispenser. To test your door seal, try the “paper test”: close the door on a piece of paper so half is inside and half is outside. If you can easily pull the paper out, your seal is likely weak. Clean the gasket thoroughly with warm, soapy water to remove any grime. If it’s damaged or brittle, a replacement gasket is usually available from the manufacturer and can significantly improve cooling efficiency.
Common Component Issues and Troubleshooting
If the basic checks don’t resolve the problem, the issue might lie with one of the dispenser’s internal components. These problems often require a bit more investigation but can still frequently be fixed without professional help.
Dirty Condenser Coils: The Hidden Heat Trap
The condenser coils are vital for releasing heat from the refrigerant into the surrounding air. When these coils accumulate a layer of dust, pet hair, and debris, their ability to dissipate heat is severely reduced. This forces your compressor to work overtime, consuming more energy and struggling to cool the unit. You can typically find condenser coils at the bottom, back, or top of your beer dispenser. To clean them, unplug the unit, use a vacuum cleaner with a brush attachment to remove loose dirt, and then a coil brush for any stubborn grime. Regular cleaning, ideally every three months, is crucial for optimal performance.
 A person cleaning dirty condenser coils of a beer dispenser with a brush and vacuum.
Malfunctioning Fans (Condenser and Evaporator): Airflow Interrupted
Your beer dispenser likely has two main fans: the condenser fan, which cools the condenser coils, and the evaporator fan, which circulates cold air inside the unit. If either of these fans stops working, cooling will be compromised. Listen for humming or whirring noises when the unit is running. If you hear nothing, or if there’s a loud squealing sound, a fan motor may be failing. For the evaporator fan, check for any visible ice buildup on the evaporator coil, as this can block the fan’s blades. For the condenser fan, ensure no debris is obstructing its rotation. Uneven temperatures inside the unit are a classic sign of a failing evaporator fan, as cold air isn’t being distributed evenly.
Compressor Problems: The Heart of the System
The compressor is the engine of your cooling system. If it’s not working, your dispenser won’t get cold. Listen closely: is the compressor running? You should hear a consistent hum or low vibration. If it’s completely silent, it might not be receiving power or could be faulty. Conversely, if it runs constantly without reaching the set temperature, or if it’s excessively hot to the touch, it indicates a struggle to cool. A gurgling noise can be normal, especially in new units, but prolonged or unusual gurgling combined with poor cooling might suggest low refrigerant. While some basic checks are possible, significant compressor issues often require a professional.
Faulty Thermostat: Misreading the Temperature
A malfunctioning thermostat can cause your dispenser to cool erratically or not at all by sending incorrect temperature signals to the compressor. If your dispenser’s internal temperature doesn’t match the setting on the control panel, or if the compressor cycles on and off too frequently or infrequently, the thermostat might be faulty. You can test its accuracy by placing a reliable external thermometer inside the unit for several hours. If there’s a significant, consistent difference between the actual and set temperatures, the thermostat likely needs calibration or replacement.
Frozen Beer Lines: An Icy Obstruction
Occasionally, your beer lines might freeze, preventing beer flow and indirectly impacting overall cooling. This can happen if the cooler was turned off for a period and then restarted, allowing condensation to freeze in the lines, or if the temperature is set excessively low. If you notice no beer dispensing, or only a trickle, and suspect frozen lines, switch off the remote cooler and allow ample time for the lines to defrost naturally. This may take several hours. Do not try to force defrosting with heat, as this can damage components.
Environmental Factors and Usage Habits
Sometimes, the issue isn’t with the dispenser itself, but with its surroundings or how it’s being used. Environmental factors can significantly impact cooling efficiency and performance.
Ambient Temperature: Location, Location, Location
Where your beer dispenser is placed can greatly affect its ability to maintain cold temperatures. Positioning it in an area with high ambient temperatures, such as a hot garage, direct sunlight, or near heat-generating appliances like ovens or commercial fryers, will force the unit to work much harder. This increased strain not only reduces cooling efficiency but also shortens the lifespan of the compressor and other components. Relocating the dispenser to a cooler, well-ventilated space can often resolve persistent cooling issues.
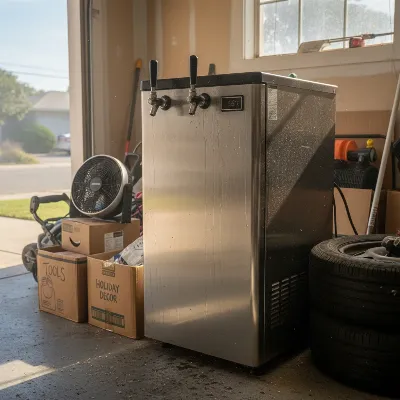 A beer dispenser struggling to cool in a hot, cluttered garage environment with sunlight streaming in.
Overfilling and Door Usage: Stressing the System
While it’s tempting to stock your beer dispenser to the brim, an overfilled unit can restrict proper airflow, especially if items block internal vents. Introducing too many warm kegs or bottles at once also significantly burdens the cooling system, requiring it to work overtime to bring everything down to temperature. Similarly, frequent or prolonged opening of the dispenser door allows warm air to rush in, forcing the compressor to engage more often and for longer durations. Being mindful of loading practices and minimizing door openings can help your dispenser maintain its cool more effectively.
When to Call a Professional
While many beer dispenser cooling problems can be fixed with DIY troubleshooting, some issues are best left to qualified technicians. Recognizing when to call a professional can prevent further damage, ensure safety, and ultimately save you time and money.
If you suspect a refrigerant leak, characterized by reduced cooling, an oily residue around coils, or persistent gurgling/hissing sounds, it’s crucial to call a professional immediately. Refrigerant can be hazardous, and handling it requires specialized tools and expertise. Similarly, compressor failure, especially if the unit is completely silent or making loud, unusual noises and not cooling, typically necessitates a professional repair or replacement. Any complex electrical faults or issues involving the sealed refrigeration system should also be handled by an expert to ensure safety and correct diagnosis. If you’ve systematically worked through all the troubleshooting steps outlined here and your beer dispenser still isn’t getting cold, it’s a clear sign that a professional’s intervention is needed.
Conclusion
A perfectly chilled pint is a simple pleasure that a properly functioning beer dispenser makes possible. When your unit isn’t cooling, it can be frustrating, but by systematically checking for common issues from power supply and thermostat settings to airflow, door seals, and component health, you can often pinpoint and resolve the problem yourself. the importance of regular maintenance, especially cleaning condenser coils and ensuring proper ventilation, to keep your dispenser running efficiently and prolong its lifespan. For more complex issues like refrigerant leaks or compressor failure, don’t hesitate to seek expert assistance. With a little care and timely troubleshooting, you’ll soon be back to enjoying refreshingly cold beer, pour after perfect pour. What steps will you take to ensure your beer dispenser is always ready to deliver that ideal frosty brew?
Frequently Asked Questions
Why is my kegerator running but not getting cold?
A kegerator running but not cooling often points to insufficient heat dissipation or a component failure. Check for dirty condenser coils, blocked airflow, a faulty condenser fan, or a weak door seal. It could also indicate a malfunctioning thermostat or a refrigerant leak, which would require professional attention.
How often should I clean my beer dispenser coils?
It’s recommended to clean your beer dispenser’s condenser coils every three months. Dust and debris accumulate over time, reducing efficiency and forcing the compressor to work harder. Regular cleaning ensures optimal cooling performance and extends the lifespan of your unit.
Can ambient temperature affect my beer dispenser’s cooling?
Yes, ambient temperature significantly affects your beer dispenser’s cooling capacity. Placing the unit in a hot environment like a sunny garage or near heat-emitting appliances will make it struggle to maintain cold temperatures, leading to inefficient operation and potential component wear.
What temperature should my beer dispenser be set to?
Most beer dispensers should be set to maintain an internal temperature between 36-40°F (2-4°C). This range is ideal for serving most types of draft beer, preserving flavor, and preventing excessive foaming. Always consult your beer’s specific recommendations for optimal enjoyment.
How do I know if my kegerator has a refrigerant leak?
Signs of a refrigerant leak in your kegerator include a noticeable decrease in cooling performance, the compressor running constantly, or the presence of an oily residue around the coils or connections. You might also hear a faint hissing sound. Refrigerant leaks require immediate professional repair.
Frequently Asked Questions
Why is my kegerator running but not getting cold?
A kegerator running but not cooling often points to insufficient heat dissipation or a component failure. Check for dirty condenser coils, blocked airflow, a faulty condenser fan, or a weak door seal. It could also indicate a malfunctioning thermostat or a refrigerant leak, which would require professional attention.
How often should I clean my beer dispenser coils?
It's recommended to clean your beer dispenser's condenser coils every three months. Dust and debris accumulate over time, reducing efficiency and forcing the compressor to work harder. Regular cleaning ensures optimal cooling performance and extends the lifespan of your unit.
Can ambient temperature affect my beer dispenser's cooling?
Yes, ambient temperature significantly affects your beer dispenser's cooling capacity. Placing the unit in a hot environment like a sunny garage or near heat-emitting appliances will make it struggle to maintain cold temperatures, leading to inefficient operation and potential component wear.
What temperature should my beer dispenser be set to?
Most beer dispensers should be set to maintain an internal temperature between 36-40u00b0F (2-4u00b0C). This range is ideal for serving most types of draft beer, preserving flavor, and preventing excessive foaming. Always consult your beer's specific recommendations for optimal enjoyment.
How do I know if my kegerator has a refrigerant leak?
Signs of a refrigerant leak in your kegerator include a noticeable decrease in cooling performance, the compressor running constantly, or the presence of an oily residue around the coils or connections. You might also hear a faint hissing sound. Refrigerant leaks require immediate professional repair.
Get our weekly buyer guide
Practical specs, not advice. Unsubscribe anytime.
I tried all the troubleshooting steps, including checking the condenser coils and making sure the unit was plugged in securely. My beer dispenser is still not cooling consistently, which is a bummer. It helped me rule out the easy stuff, but I think my compressor might actually be failing. Still, good to have a checklist.
My kegerator suddenly stopped cooling last week, and I was panicking. I checked the power connection first, but that wasn’t it. Then I remembered reading about obstructed airflow. Sure enough, I had some boxes pushed right up against the back vents. Moved them, and within an hour, my beer was perfectly chilled again. Such a simple fix!
This was super helpful when my dispenser started acting up. I thought it was a major issue, but it turned out my thermostat was just set too high. I adjusted it to 38°F, and now everything is back to normal. I appreciate the clear guidance on the optimal temperature range; it saved me a service call.
I’ve had my kegerator for years and never had a problem until recently. The beer was getting foamy and warm. I followed the advice about clearing blockages around the vents and coils, and it made a huge difference. It’s amazing how much dust and pet hair can accumulate back there. Now it’s running like new!